Sunday, September 19, 2010

what links us together.

Whenever I'm having a bad day, I cook.

It doesn't even matter if it something simple, like making the vinaigrette for a salad from scratch; sometimes all it really takes is just the mindless act of chopping ingredients on a cutting board, or stirring a pot of something bubbling away at the stove, that makes me smile.

Whatever it is, the kitchen never fails to make me feel better. Growing up with a younger brother who was handicapped, my family had its fair share of heartache. But I've never been one of those people who looks back on their childhood as a bad one. It wasn't all that bad, just unstable; to the point where constant change and adapting became normal to me, like breathing. 

So maybe that's why, from a young age, I fell in love with baking. The precise measuring of ingredients; the smell of something deliciously sweet or savory that permeated from the oven. I loved it all. Mostly, I loved the predictability of it; that I could start off by just reading the instructions for a recipe, and by the time I was whisking ingredients together, or spooning dough into rounds on a cookie sheet, I could transport myself to a different place. A place where, by following a few simple directions, butter, sugar and flour could produce something as consistant and wonderful as strawberry shortcake. 

Today, when I cook in my kitchen, I don't just bake; I boil and roast and fry and saute and blend. I whisk and caramelize and knead and stir. I don't have to follow a recipe's instructions as often as I used to, and sometimes I make up my own. But there's one thing that hasn't changed since I was that little girl, standing in my parent's kitchen, trying to make sense of my life by way of chocolate chip cookies. What hasn't changed is that cooking, no matter what form it takes on, still has the power to transform me, or the people I love, even on the hardest of days. 

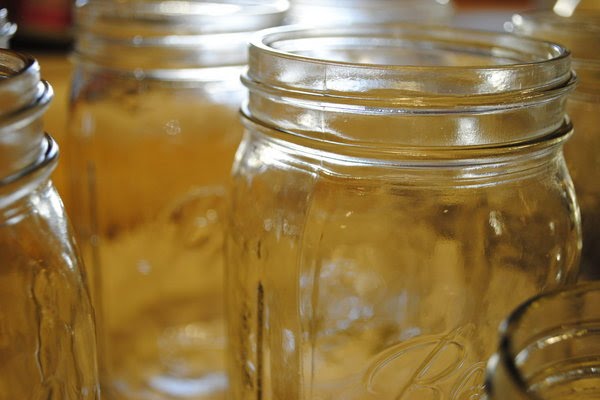
I'm not that little girl any longer, and I've become a much better cook than I was then. But that doesn't mean that I've forgotten who I was, or where I've come from. Each time that I sit down to eat on my grandmother's wooden dining table, or churn sorbet in my mother's old Kitchenaid Ice Cream maker, I take my family with me. The memories, good and bad, make up the woman that I am today, like the many layers that make up the dishes I create in my kitchen.

I cook, because it makes me happy, and it makes other people happy. We all have different ways in which we deal with the stress or pain in our daily lives. For some people, it's a glass of whiskey or wine at the end of a long day- or yoga, or running, and that's just fine. For me, I choose to cook in my kitchen. The pots and pans, the wooden spoons and measuring cups- the way it makes not just me, but anyone, smile when they eat something that tastes delicious. 

Like me, both of my brothers share a love for food. My older brother, Steve, was a restaurant chef for many years, and my younger brother, Michael- well he loves anything you put in front of him, especially if it's laced in ketchup. I like to think that it's something we share as siblings, a tiny invisible string that links us together.

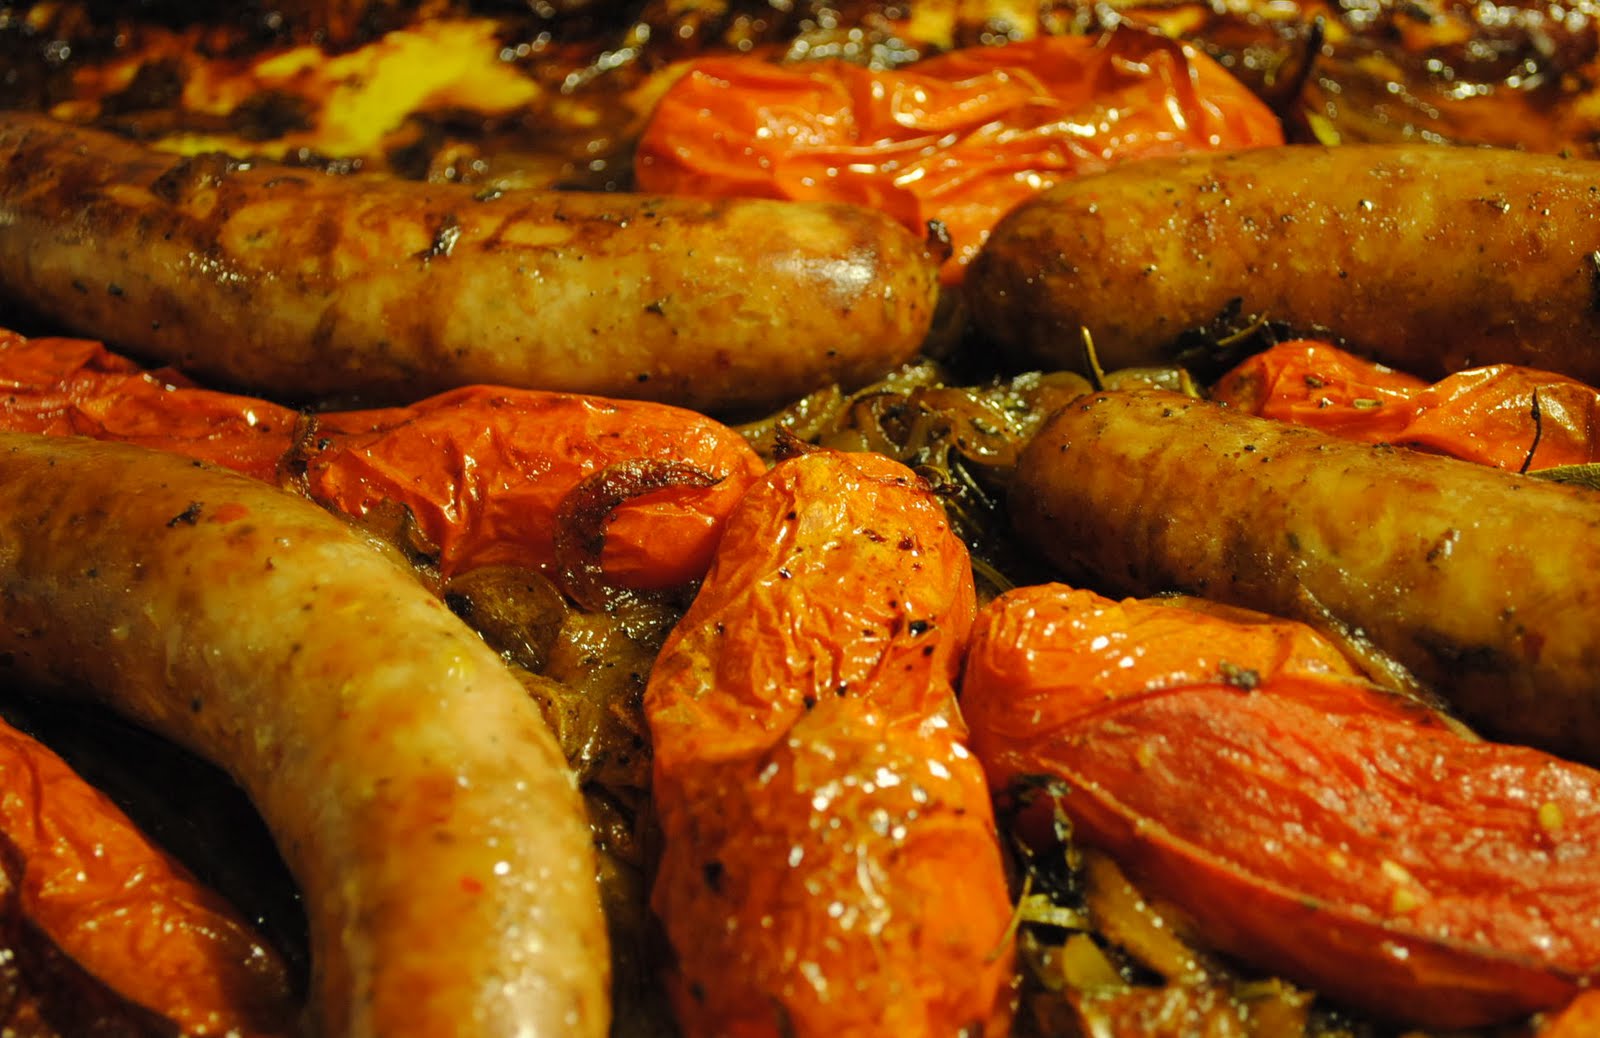
They're who I am thinking of today, while I wait for my Roma tomatoes and Italian sausages to finish roasting in their juices with rosemary, thyme and olive oil. I can feel my bad mood begin to lift already. I'll smile when I taste the caramelized onions and garlic, whose flavor has mellowed and sweetened during their time in the oven- the perfect balance to the acidity of the tomatoes and the richness of the meat. And I'll smile because of that little girl in her parent's kitchen, trying to make sense of the world with her mother's cookbook, her grandmother's green pyrex mixing bowl, and an oven.

Roasted Roma Tomatoes and Italian Sausage
Yields enough for two hearty servings (but can be doubled very easily to accommodate more)


A Note:


This is the kind of recipe that will put anyone in a better mood, no matter who they are. It's mindless cooking, but comforting, and the most rewarding dish to to eat. You can serve it with big hunks of toasted bread, or just eat it straight from the refrigerator with a knife and fork, which is exactly what John and I did. It's also fabulous the next day, chopped up and tossed with any kind of pasta. 


Ingredients:
  • Four good quality Italian sausages (we used "hot Italian", but any Italian type will do)
  • 8 Roma tomatoes
  • One large cippolini onion, thinly sliced (or any other kind of yellow variety)
  • Five garlic cloves, peeled and smashed
  • a sprig or two of rosemary
  • a sprig of thyme
  • 1-2 bay leaves
  •  extra-virgin olive oil
  • a few small glugs of good quality balsamic vinegar
  • kosher salt and freshly ground black pepper    
Directions: 
  1. Preheat oven to 375 degrees.
  2. Layer the sliced onions and garlic on the bottom of a large baking/roasting tray. 
  3. Drizzle a decent amount of olive oil into the pan, enough to decently cover the onions and garlic with oil. Sprinkle with salt and pepper.
  4. Place pan in the oven, and let the onions and garlic caramelize, about 15 minutes.
  5. Remove from oven and add roma tomatoes, herbs and sausage to the pan. Sprinkle with a bit more salt and pepper and drizzle a tiny bit more olive oil, if desired. Toss everything together to coat with oil. 
  6. Roast in the oven for 30 minutes. 
  7. Turn sausage over on other side, and pour a few glugs of balsamic vinegar over everything. Roast for another 20-40 minutes, depending on how browned you like your sausage. 
  8. Check seasoning, and serve on its own- or even better- with big hunks of toasty bread. 

Friday, September 17, 2010

keeping summer around.

Summer came late this year.


June and July passed quickly, and so did my two week trip to Europe; and by the time August rolled around, the sun had still managed to stay hidden behind thick, grey clouds on more days than I could count. Summer isn't exceptionally warm when you live in a Northern California beach town, and you get used to the fog and the colder winds that blow in from the ocean. But this felt different. It felt like Spring would never leave, permanently stuck between seasons, repeating itself like a broken record. And it was starting to get personal. The cold weather had been bullying my garden for so long that it began to take a toll on our fruits and vegetables, leaving them sad and stagnant. Even my neighbors and friends agreed that the weather was affecting everyone, leaving us to sulk around inside, hoping that the never-ending fog outside would somehow dissipate. I felt it too, in the cool breeze that blew through my window at night, forcing me deeper underneath the covers.


But then the end of August came, and things began to change. My garden perked up, and so did I, and all of my favorite seasonal produce finally began to pop up at the farmer's market, which was just starting to come alive again. Watermelon, heirloom tomatoes, green beans, basil, sweet bell peppers and spicy hot peppers. John and I took back with us as much as we could, including a bouquet or two of bright yellow sunflowers that had beckoned to me earlier.


It's not that summer had done it on purpose, making us wait all that time. Maybe she had just forgotten for awhile, or overslept. Either way, we forgave her, asking only in return that she might stay around, for just a little while longer.


It's mid-September now and the sun is still shining, but soon enough it will be gone. Eventually the summer produce will be gone too, so there's really only one thing we can do. We'll stuff all of that delicious food into jars and can it. Jars filled with all kinds of jams and preserves, of green beans and carrots and peppers pickled in their own spicy brine, of homemade ketchup and heirloom tomatoes floating in their own juices. W'ell pickle and preserve and can until we can't stand it any longer- and when winter finally comes back around, and the cold air leaves it's mark on our cheeks, we'll stay inside where it's warm and open a jar of something that tastes like summer. Something to look forward to.


This is just the start. We've canned a lot, and we plan to can a lot more. And lets not forget that fall harvest will be upon us soon enough; so there will be lots of tasty additions to our growing canned collection. Already, the bartlett pears have appeared by the box load, golden and plump and ripe with sweetness. Which is exactly why, last weekend, we mashed them and forced them into submission with a little bit of lemon juice and sugar and vanilla bean. We appropriately titled our creation "Vanilla Bean Pear Jam", and we're proud of it. I really hope that you make it, not just because it's my recipe, but because it's that good. In my opinion, it puts the "J" in Jam- and somehow I think you'll agree.


Vanilla Bean Pear Jam
Yields about 5 half-pint jars 


A must read side note: 


The first time I tasted pear jam with vanilla bean was this summer, while I was staying at my friend Virginie's apartment in Paris, France. The first breakfast that we had together, Virginie broke apart a fresh baguette that she had picked up from her favorite neighborhood "boulangerie" (every Parisian has their personal favorite boulangerie, in which they swear that all other boulangerie's come second). To spread on our bread, she offered me the jam, which was a coveted old family recipe. In fact, the opened jar at the table had been made by Virginie herself, on a recent trip to her parent's house in the country. It was, as I'm sure you can imagine, delicious; and I promised myself I would try to recreate it once I had made it back home to the States. I'm not sure what Virginie's family uses for sweetness, or if they add lemon juice or pectin to theirs, but this combination works for me and tastes good enough that each time I take a spoonful of it, it brings me back to Virginie's kitchen. I hope she approves.


Ingredients:
  • 4 cups of bartlett pears, peeled, cored and mashed
  • 1/4 cup of lemon juice
  • one fresh vanilla bean pod
  • 3/4 cup unrefined granulated sugar
  • all-fruit natural pectin, amount varies (amount required depends on the pectin brand you choose; it's not a problem, just make sure you use the amount that your brand suggests for the amount of fruit and sugar that is stated in my recipe)
  • five half-pint jam jars and their lids
  • very large pot, or canning pot, for boiling 
Directions:
  1. Wash your jars and lids with hot, soapy water; rinse well. Leave the lids to dry on a clean kitchen towel. Place the jars in a canning pot and fill with warm water, until the water reaches at least 2 inches above the jars. 
  2. Bring to a rolling boil, and then turn down the heat; let stand in hot water.
  3. Place mashed pears and lemon juice into a large saucepan. 
  4. Add proper amount of calcium water (if using- refer to your brand of pectin's directions).
  5. Mix sugar and proper amount of pectin in a separate bowl, until thoroughly combined.
  6. Scrape the grains out of the vanilla bean pod, and place them (along with the pod) in with the pear mixture. Bring to a boil on medium heat.
  7. Once the mixture is boiling, add pectin-sugar mix to the pan; stirring vigorously for 1-2 minutes, until it has properly dissolved.
  8. Return to boil, and then remove from heat. Remove the vanilla bean pod.
  9. Remove jars from hot water. Ladle the jars with the jam to 1/4" from the top of the jar. This is very important if you want a proper seal; don't mess around too much with how much space you leave.
  10. Screw on lids, and place jars back in the pot of hot water, and bring back to a rolling boil. Boil the jars for 10 minutes, from when the water immediately begins to boil.
  11. Remove jars from water. Let jars cool. (You may even hear a "ping" or two come from the jars while they cool; don't worry, this just means they are sealing correctly)
  12. Check seals for proper seal- lids should be sucked down. Lasts about three weeks once opened.

Saturday, August 28, 2010

forgiveness in the form of Focaccia.

I have a confession to make. It's something I could only trust with you, so I hope you can keep a secret. Four weeks ago, I came home from my amazing trip to Europe. I took my clothes and shoes out of my suitcase, put them back in their usual place in my closet. I gently arranged the coveted teas I brought back from Paris on my kitchen shelf, alongside my freshly dried chili pepper flakes brought back from Barcelona. I ate a lot of chocolate, which I managed to sneak through customs in the airport, along with a whole box of heavenly French macarons that, on a side note, John and I polished off rather quickly.

And then. I found myself in my kitchen, and I began to cook. It had been awhile, and I realized right away how much I had missed it. Don't get me wrong- it was so nice being with friends, sharing good wine and laughs and recipes from their kitchen. But back at home on my own turf, I took one loving glance at my Le Crueset pans and my favorite bread knife and my Kitchenaid mixer, and I knew it was all over from there. Oh reader, I made so many things. I made a gorgeous plum torte, a french apricot tart with a creamy vanilla filling, three pots of spicy chicken noodle soup, a pot of lentil sausage soup, a pot of fennel vegetable soup, a roast chicken, two loaves of foccacia bread, and Panzanella salad with grilled bell peppers, onions, crusty bread, and tomatoes. I made zucchini fritters, fig ice cream, chicken stock, and heirloom tomato salad. Hell, I even made a loaf of oatmeal sandwich bread.

But the problem is, dear reader- the reason I am telling you all of this- is that I made all of that wonderfully delicious food, and I didn't blog a single one of them. Not only that, but I never even gave you one photograph from my travels to enjoy while you waited! And there were so many things to show you- like the one of the best cafe creme I ever had, in a bistro in Paris; or the one of John eating a really, really good carne empanada, at the unbelievably amazing La Boqueria Market in Barcelona, Spain.

So, I'll admit it. I have been a complete and utter slacker, in every possible way. I have been a slacker in the way of chicken noodle soup, zingy and warm from suprising ingredients like lemon and cinnamon; and I've been selfish, ever so selfish, keeping all those wonderful recipes to myself. I didn't even share the fig (fig!) ice cream with you, and it's because of my guilt that I am here to offer you my humblest apologies, in the best way I can; I am here to offer you the recipe for my Tomato-Rosemary Focaccia Bread.


I know. I know what you're thinking. That you're not so easily bought. That you're forgiveness is worth far more than one stinking recipe for bread. But that's because you don't know how perfectly delicious my focaccia bread is. And how suprisingly easy it is for you to duplicate. You'll have to make it yourself to fully understand, and that's why I'm hoping you will. So if you haven't given up on me yet, and you're still reading this, than please, for crying out loud, just make the damn bread. I promise it won't dissappoint, and you'll be so happy when it comes out of the oven, golden and speckled with rosemary and tomato and fragrant from yeast and garlic and salt, that you'll forget all about my horrible, selfish ways. Perfectly crunchy on the outside with a soft, chewy crumb in the inside, this bread is the perfect accompaniment to any meal, anytime of the day; but I personally think it's best eaten straight from the pan, when it's still warm from the oven.  Anyway, you decide, and in the meantime, I'll leave you with the photographs I promised I'd show you, and I hope that you'll forgive me.

a cafe creme (espresso w/milk) at a French bistro.
Near the Louvre museum in Paris.
The best carne empanada I've ever tasted.    

My personal fave: chili's, and lots of them- at La Boqueria Market in Spain.

Mushroom varietals at La Boqueria.


Tomato-Rosemary Focaccia Bread


On a side note (because there's always a side note, isn't there?): This recipe is adapted from a March 2002 issue of Gourmet magazine, but their version called for more flour, and in my opinion, the dough came out far too dry- which is why my version starts off with less flour, and you can just add more if your dough needs it.  I also added the garlic and tomato- but if you're not a fan, there's no reason why you couldn't omit them. I've made this recipe dozens of times without the tomatoes, and played around with a few more herb combinations, which I encourage you to do. This is just my personal favorite combination at the moment. Whatever you do, promise me you will add the rosemary. It's a must.
  
Ingredients:
  • 1 (1/4-ounce) package active dry yeast
  • 4 cups (may need a bit more depending on how dry/moist your dough is) unbleached all-purpose flour, plus additional for kneading
  • 1/4 cup plus 3 extra tablespoons extra-virgin olive oil
  • 1-2 garlic cloves, thinly sliced
  • 1 teaspoon course sea salt
  • 2 and 1/2 tablespoons table salt
  • 1 tablespoon finely chopped rosemary, plus extra 1/2 teaspoon
  • 1 large tomato (or two small tomatoes) cut into 1/4-inch thick slices
Another note: I use a KitchenAid stand mixer to bring my dough together, because it's easy and quick; but if you don't have one, you can certainly do it with your hands and knead it the old-school way. 


Directions: 
  1. Stir together 1 and 2/3 cups lukewarm (105 to 115 degrees) water and yeast in a bowl of mixer and let stand until creamy/foamy, about 5 minutes. 
  2. Add flour, starting off with just 4 cups, and adding more, a 1/4 cup at a time, if your dough seems too wet. Add 1/4 cup oil, 1/2 teaspoon chopped rosemary and 2 1/2 tablespoons table salt and beat with paddle attachment at medium speed until a dough forms. Replace paddle with dough hook and knead dough at medium-high speed until the dough is soft, smooth and sticky, about 3-4 minutes.
  3. Turn the dough out onto a lightly floured surface, and knead in 1 to 2 tablespoons more flour. Knead dough for 1 minute- your dough should feel slightly sticky- then transfer dough to a lightly oiled bowl and turn dough to coat with oil. Cover with plastic wrap, and let rise, at room temperature, until it is doubled in bulk, about 1 to 1 and 1/2 hours.
  4. Press dough evenly into a generously oiled 15x10x1-inch baking pan. Let the dough rise once more, covered completely with a kitchen towel, until doubled in bulk, about 1 hour.
  5. Preheat oven to 500 degrees.
  6. Make shallow indentations all over dough with your fingertips, then drizzle evenly with 3 tablespoons of olive oil and sprinkle with 1 tablespoon chopped rosemary.
  7. Lay tomato slices evenly on top of dough, making sure not to let any slices sit too close to the edge of the dough (their juices will run off the sides of the bread and create a mess, and trust me you don't want that). 
  8. Sprinkle 1 teaspoon of coarse sea salt and the sliced garlic evenly over the top of your dough.
  9. Okay, here's the important part: Bake in the middle of the oven, for about 6 minutes, until lightly browned, then turn the oven down to 475 degrees. Bake until golden and cooked through, about another additional 15-20 minutes.
  10. Immediately place focaccia onto a rack using two spatulas, or inverting a rack over pan and flipping the focaccia onto the rack.

Monday, June 28, 2010

a farewell with deli meat.

Last night, John and I went over to my brother's house for dinner. It was one of those nights when nobody felt like cooking, so we all agreed on something uncomplicated. Steve's wife, Elena, had just come back from a recent trip to Washington D.C. to visit her mother, and had found herself back in an old Italian deli that she had visited often as a young girl. She brought back with her a variety of mouth-watering Italian deli meats, like Mortadella and spicy Ham- and with that in mind, we decided on a dinner of Italian-style sandwiches, with wax peppers, pepperoncinis and olives to snack on the side.

We layered thick slices of freshly baked Focaccia bread (from local breadmaker Brio) with buffalo mozzarella, provolone and the prized deli-meats, and then topped it all off with a sweet-and-spicy chili-pepper spread and lettuce and tomato. Mine disappeared rather quickly, and I couldn't help thinking how lucky I was that in my family, this was considered an "uncomplicated" dinner. It was absolutely delicious. And then, of course, I had a never-ending supply of hot peppers to chose from- which as you might already know, makes me very, very happy. My brother and I both have a special place in our hearts for spicy food, so I can always count on getting my fix at his house.

Between big bites of food and a few cold beers to wash it all down, we chatted about the World Cup, laughed until our stomachs hurt, and discussed my upcoming trip to Europe (two more days!). While we chatted, Steve and Elena's kids- Nico and Natalie- popped in and out of the conversation, eager to show us a new toy (Natalie just acquired her first set of golf clubs), or just to ask for more yogurt (Nico's favorite). It was a great meal, with great company, and I couldn't think of a better way to say goodbye to my brother and his family before leaving for my trip.

At this point, I'm sure you've guessed that I have no recipe for you today, but I hope you can cut me some slack, since I technically could be packing my suitcase, instead of writing on here. I guess, since were on this subject, I should also say that I can't promise I will be posting many recipes on here during my trip- but I can promise you lots and lots of photographs of food, and stories of my adventures along the way.


I'll be back in the States in about a month, so in the meantime, I'll keep you all posted, and wish me bon voyage!

Friday, June 25, 2010

Wishful Thinking.

There are so many reasons why I love Italian food, and it's not just because my boyfriend is Italian. Even as a young girl, I always had a special connection to the cuisine. I think at one point I even wished my own mother (hey Mom! I love you!) would turn into an Italian one, so I could rush home from school everyday to find her standing at the stove, stirring a big pot of tomato sauce, and yelling at me to chop more garlic. That wish probably came from the fact that my first serious boyfriend- who was also Italian (what can I say, I guess I have a thing for them)- had a mother who was born in Italy, and still had the accent to prove it. Whenever she would call on him to come down for dinner, or ask me if I wanted a piece of her homemade Tiramisu, I would swoon every so slightly at the sound of her voice, my head filled with visions of an unknown country whose food I had fallen in love with.

As it goes, my mother is actually Jewish, not Italian, but she does make a mean tomato sauce. Seriously. It's from her recipe that I've created my own, and although I've never been to Italy, I think it's some of the best tomato sauce I've ever tasted. It's tangy and sweet,  rich and creamy, and hey- even my boyfriend approves.
 

Basic Tomato Sauce
Yields enough sauce for about 1 pound of pasta, or serves 4

Almost every Italian dish, including this one, starts with a soffritto, which is a combination of finely minced vegetables and aromatic herbs. The most basic of soffritto consists of a mix of onions, carrots, celery, garlic, salt, and extra virgin olive oil. For this recipe, I've tweaked mine a bit, and used butter instead of olive oil, which I think makes all the difference in the flavor of this particular sauce. I've also omitted the celery, but you could add it in and I'm sure it would taste just fine. In Italian, soffritto means "fry slowly"- and I can't tell you enough how important it is to spend some serious time with your soffritto, because the more patience and love you give it, the more flavorful your tomato sauce will be.


A few other things to think about:


I recommend lightly blending your sauce together at the end in batches with a blender. Once blended, the carrot creates the most beautiful creamy looking sauce, so much so that someone might think it has actual cream in it- and don't worry, I won't tell if you won't.


Also, this recipe can be made with either fresh tomatoes or canned, depending on what you can find. In the Summer, I usually use fresh tomatoes, since they are at their peak of flavor, and in the Winter when tomatoes are more bland and mealy, I use them canned. This summer, however, there has been absolutely no sign of a decent tomato- so I made my sauce with the canned tomatoes- and honestly, I can't tell the difference! I think the most important part of this recipe is the soffritto, anyhow- but you decide.

Ingredients:
  • 1 28 oz. can of good quality whole tomatoes, including their juice
  • 1 medium yellow onion, finely chopped
  • 1 small carrot, chopped
  • 5 tablespoons unsalted butter
  • 2 garlic cloves, minced
  • 1 teaspoon tomato paste
  • salt, to taste
  • pinch of red pepper flakes, optional
  • 2 tablespoons fresh basil, julienned 
Directions: 
  1. Heat butter in a heavy saucepan over medium heat. Once butter has melted, add onion and carrot and stir to coat. Sprinkle with salt. Reduce the heat to low, cover, and cook for 20 minutes, stirring occasionally until the vegetables are softened and cooked through.
  2. Remove cover and add minced garlic. Increase heat to medium, and cook garlic for one minute. Add the tomatoes and their juice, shredding them with your fingers to break the whole tomatoes up.
  3. Add the tomato paste and red pepper flakes (if using), and season with a little more salt, to taste. Bring sauce to a low simmer, adjusting heat accordingly, and cook, uncovered until sauce has thickened about 20 minutes. 
  4. If you can, it is recommended that you blend the sauce in batches through the blender. Be careful! This step can be tricky and hot- don't let your blender explode and spray tomato sauce all over the kitchen walls (trust me, I've done it, and it's not fun).
  5. Add julienned basil leaves into sauce and mix well.
  6. Toss sauce with pasta noodles, and top with freshly grated parmesan cheese.

I've got my head in the clouds.

Last night, John and I were lucky enough to come across some unbelievably fresh Wild King Salmon. We were told it had just been taken off the truck from Washington only two hours before, and in that moment, we were sold. The Salmon being the star of the meal, we decided to marinate it in a Teriyaki sauce and then pan sear it. We gravitated towards some bright green and vibrant looking Swiss chard, and agreed to saute it the usual way with olive oil, garlic and a bit of lemon juice. We plopped a few Garnet yams into our basket, with visions of them baking in the oven, and just like that, dinner was planned.


I am an unabashadly huge fan of baked yams, and when they are roasting in the oven with olive oil, thyme, salt and pepper, I can't imagine why anyone would not be. Filled with vitamins and nutrients and lots of flavor, yams (if not already) should be your best friend in the kitchen. They also pair perfectly, if I might add, with the sweet and buttery flavors of our Teriyaki Salmon.

I would like to say that I stopped here, but no, I just had to make homemade ice cream. I just had to place a saucepan with cream and sugar on the stove top, and then apparently, when I walked away for approximately 30 seconds, it just had to bubble and boil over and spill onto the stove, where it instantly spread and crackled into a thin layer of burnt crisp.

Well. Wasn't that fun? I hope you enjoyed reading that as much as John and I enjoyed cleaning it up and watching our kitchen smoke up so bad that we could have played Marco-Polo with our eyes open. Apparently I wasn't done with the fun, or maybe I couldn't think straight inside the cloud of burnt milk. But somehow, the car was started, a trip to the grocery store was taken, and suddenly I found myself staring at a brand new carton of heavy whipping cream, in a somewhat less smoky kitchen.

Let me tell you reader, if you think that was the end of that, you are very, very mistaken. Honestly, you really should know me better at this point. You've read about my adventures with the Tomato Tart, after all. It should come as no surprise, then, that in the time it took to finish dinner, I had whipped and stirred another batch of ice cream into submission, and had even added bits of chocolate chunks to it at the last minute, on a whim.


After an unbelievably delicious meal (the salmon, with a caramelized top and a buttery inside was beyond good, I tell you- beyond), we sat down with cups of our ice cream topped with fresh strawberries, and it was, alright. Not amazing, just alright. I've made some really tasty variations of ice cream in my day, and the consistency of this one was perfect. But after a few bites, it was decided that the recipe I used had called for too much sugar. I like my ice cream smooth and rich but not too cloyingly sweet. I'm sure you'd agree.

So you see, I can't give you the recipe for the ice cream, because I would never, ever give you a recipe I wasn't completely enamored with. Don't worry though. It's only the beginning of summer, and I promise to supply you with some of my favorite homemade ice cream recipes in the very near future. But what I can give you right now, is the recipe for the baked yams. Easy, simple, and perfect- every time.

Baked Yam Halves
Serves 2

Ingredients:
  • Two medium yams (we used Garnet, but you can obviously use Jewel instead) 
  • good olive oil
  • one teaspoon or so freshly chopped thyme
  • kosher salt
  • freshly ground pepper
Directions:
  1. Preheat the oven to 400 degrees.
  2. Halve the yams length-wise and place them in a shallow baking dish in a single layer, cut side up.
  3. Drizzle with olive oil and sprinkle with thyme, salt and pepper.
  4. Bake until golden brown and very tender, about 40-50 minutes.

Thursday, June 17, 2010

Few things are better than this.

So after this week's Tomato Tart fiasco, I was glad when tonight's dinner came together smashingly. Then again, few things (and I mean very few things) are better than pasta. Especially, if that pasta involves butter, prosciutto and parmesan cheese. And then of course, there were the sage leaves fried in brown butter, and I think I might have melted into my chair after the first bite.


There is something so wonderfully homey, so wonderfully heart-warming about a bowl of pasta. But it is summer, and there really isn't any need to be warmed up, when the sun is shining like it was today. That's why this pasta is so perfect. It's the ultimate go-to dish when you feel like making something rustic and comforting, but also something quick and effortless- the kind of meal that won't have you using your stove or oven any longer than you need to on a hot day. It's also sort of a godsend, when you are still(!) getting over the scars from a previous dinner gone bad (we all know what I'm talking about). So do yourself a favor, and make this amazingly no-fuss pasta that will have you swooning in no time (from the taste, not the heat, I swear).


And since we are on a roll here, I thought I would share another low key recipe that is quite the regular in our kitchen- and one that goes perfectly with the aforementioned pasta, if I might add. I'm talking about broccoli, oven-roasted with some garlic and olive oil and then topped with a bit of parmesan cheese and lemon zest. I know, I know, you thought I would never roast a single thing after the tomatoes, but look at me now! Like the old saying goes, "If you can't succeed, try, try again."


Anyway, back to the recipe. I am here to tell you that I became an instant broccoli lover- no wait- an instant broccoli fanatic from the moment I tried this. And I'll have you know, I didn't even like the vegetable until this recipe. And if that's not enough to make you want to get up right now and roast some broccoli in the heat, than maybe this will: I will bet you twenty dollars that if you make this for someone who claims to dislike broccoli, they will totally and forever be changed after one bite. They will probably even ask for more, because they will like it that much. Seriously, I'm betting money on this dish. So come on, make it- I dare you.


Roasted Broccoli with Parmesan

Some notes: This dish is adapted from an Ina Garten (Barefoot Contessa) recipe. My version serves two, but can be multiplied very easily to accommodate more if needed. 

Ingredients:
  • 2 large heads of broccoli
  • 2 large garlic cloves, thinly sliced
  • good olive oil
  • generous pinches of salt and pepper
  • 1 teaspoon of lemon zest
  • 1/4 cup grated parmesan cheese
Directions: 
  1. Preheat oven to 425 degrees.
  2. Cut the broccoli florets from the thick stalks, leaving an inch or two of stalk attached to the florets. Discard the rest of the stalks. Cut the larger pieces through the base of the head with a knife and pull the florets apart.
  3. Place the broccoli florets on a baking sheet in a single layer. Drizzle the the florets generously with olive oil and then toss with the garlic. Sprinkle with salt and pepper. 
  4. Roast for 20 to 25 minutes, until florets are crisp-tender and some of their tips are browned.
  5. Remove the broccoli from the oven and immediately toss with parmesan and lemon zest. 
Pasta with Prosciuto and Fried Sage Leaves

Some notes: This recipe is a combination of a few different recipes and variations, including this one. It serves two, generously, but feel free to scale up the recipe to your preference.


Ingredients: 
  • About 6 ounces dried pasta, whatever you prefer (although this dish is best with egg Tagliatelle or egg Papperdelle, which is what we used)
  • 2 oz. prosciutto, sliced 1/8 inch thick 
  • 2 tablespoons unsalted butter
  • Freshly grated Parmigiano-Reggiano 
  • kosher salt
  • good olive oil
  • 10 sage leaves
Directions: 
  1. Drizzle enough olive oil to coat the bottom of a skillet, about 1/4-inch deep, on medium-high heat. Add sage leaves, and cook for about 1-2 minutes, flipping once. Transfer to paper towels.
  2. Bring a well-salted pot of water to a boil.
  3. In the meantime, cut the prosciutto into thin strips length-wise, about a 1/4-inch wide- and then cut the strips in the other direction, about 1-inch long.
  4. Place the butter in a large skillet over medium heat. When the butter is melted, add the prosciutto. Sprinkle with a small pinch of kosher salt. 
  5. Saute the prosciutto until it loses its raw color (but make sure you don't let it brown), about 1 to 2 minutes. Remove from heat.
  6. Add the pasta to boiling water and cook until it is al dente. Drain the pasta, but not too thouroughly, leaving some moisture on the noodles- the starch from the pasta water will help create a sauce when everything is tossed together. 
  7. Transfer the noodles into the skillet with prosciutto, and toss. Grate parmesan cheese on top and toss once more. Top with sage leaves, and serve immediately, with more parmesan to your preference. 

    Wednesday, June 16, 2010

    Dear Martha.

    I have always considered myself quite the optimist; but sometimes life’s challenges can be a bit overwhelming. Especially, when one of those challenges includes a Roasted Tomato Tart.

    I am here to tell you that yesterday was not a good day in the kitchen. In fact, when I woke up this morning, I was still thinking about how disappointed Martha Stewart must be, as I had adapted the tart recipe from her. And although my Pâte Brisée (traditional French tart crust) turned out just as planned- and looked just as golden and buttery as the one in Martha's baking cookbook- the rest of the tart was a soggy, sad mess. So sad, dear reader, that I could not bring myself to post a photograph of the disaster on here; I didn’t want to scare you, nor did I want to give you bad dreams. 

    I’m not even sure how it happened. I roasted a head of garlic, until it was fragrant and oozing out of it’s layers, and I was humming quietly to myself while the tomatoes did their dance in the oven with thyme, olive oil and salt. Hell, I had even bought the expensive Gruyere cheese, thinking, why not? Go big.  But somewhere between the roasting and the humming, my tomatoes began to take on the form of sundried instead of roasted. Oh yah. You heard me.  Shrunken and shriveled into themselves, I placed the pan of anemic tomatoes on the counter and John and I just stood there, silent, taking it all in. John, for his part, tried to reason with me, gently suggesting that we might order a pizza before it got any worse; as it is a well known fact that for me, a bad day in the kitchen is a very, very bad day indeed. Catch my drift?

    I should have agreed to order a pizza. I should have stopped before it was too late. But you see, I had Martha there, waiting, and I did not want to let her down. So I forged onward, assembled the tart and threw it in the oven before I could change my mind. 

    The thing is, sometimes I really am too much of an optimist. I was silly enough to think that the oven would work its magic on my poor, dried up tart and out would appear a fragrant, juicier version of itself. So you can imagine my surprise- and I’m sure you saw this coming- when sometime later, I retrieved the tart from the oven, and it had not transformed after all, and was nothing but a sad, sunken sight. 

    Dear Martha, please accept my humblest apologies. I hope you can forgive me for  completely and utterly destroying your recipe. It might have tasted pretty good, but in all honesty, it was not worthy of your approval. I also hope you are not angry with me, because now I am going to rid myself of you, for just a little while, and focus on something that did go right in my kitchen: Taco Night


    Phew. Now that that’s over, can we please talk about Taco Night? Taco night was something I grew up with, so much so that when I think back to weekly family dinners, taco night blurs any memory of other meals eaten (well, that and spaghetti and meat balls). I remember chopping the ingredients for the salsa, my mother peeking over my shoulder every once and awhile to check on my progress. In those days, I was afraid to have the last word on whether something was finished or seasoned well enough. I didn't know what to look for, what nuances would give away whether a dish was just right.
    "It needs more cilantro, don't you think? And a little more salt", my mother would say. And she was always right.

    If taco night is not already a part of your weekly schedule, I strongly suggest that you change that right away. Especially if your tacos are as good as ours, piled high with spicy, pan-fried steak, caramelized onions and a zingy, homemade Pico de Gallo salsa. Served alongside tortilla chips and lime and paprika-spiked corn-on-the-cob, each and every bite is like melt-in-your-mouth heaven. To this day I still have yet to taste a better taco. Seriously. And that’s saying a lot, because I grew up in California, where taco stands and mexican food joints were a plenty.


    These tacos are inspired by my older brother, a wonderful cook in his own right. When summer is upon us and dinner ends up at his place, he has been known to fire up the grill and cook up a phenomenal tri-tip steak, which is cut into thin slices and served with caramelized onions, another side or two, and then placed atop some warm tortillas. Served with homemade margaritas, a few moans have been known to escape from my mouth (okay, or a lot of moans). 

    These days, when it’s taco night at our house, and John is practically skipping through the kitchen with joy (tacos, as it happens, are one of his favorite things in the whole world), I seem to always come back to my brother’s delicious combination, and it never, ever disappoints. So go ahead, declare taco night at your place, and make an excuse to try these. I promise, you will not regret it, and who knows, you might even catch yourself moaning. 


     A few things: 


    Although we happened to pan-fry our tri-tip, you can certainly grill it (like my brother does). What I love about this meal is that you can use the same pan throughout the cooking process- for frying the garlic and jalapeno, the steak, and the tortillas- and we all could use a little less time washing dishes and a little more time eating in the kitchen. And as for sour cream: we like to use non-fat plain greek yogurt. I know, it sounds crazy, but it tastes exactly like sour cream, and it's so much healthier. We stumbled upon the yogurt idea once, when we realized we had forgotten to pick up sour cream for taco night, and both of us were to lazy to go back to the store. To our surprise, the yogurt tasted wonderful on the tacos, and we've been using it in place of sour cream ever since. This recipe serves two generously, and there is usually a little extra of everything for leftovers (or snacking) the next day. Enjoy. 

    Pan-fried Steak and Caramelized Onion Tacos, with fresh Pico de Gallo Salsa

      
    Ingredients for tacos:   
    • one pound of Tri-Tip beef, cut into roughly 2-inch strips
    • 4-6 yellow corn tortillas (we use a brand called La Tortilla Factory, and we like their 'Sonoma Organic Yellow Corn Tortillas')
    • good olive oil
    • few generous pinches of salt and pepper
    • few generous pinches of cayenne, paprika, chili powder and brown sugar
    • Caramelized Onions, recipe follows
    • non-fat greek yogurt, amount depending on your preference (we usually use one single-person serving container of yogurt and it's always plenty)
    • few slices of lime
    • freshly chopped cilantro 
    Ingredients for Salsa:
    • 2-3 cloves of garlic, minced
    • one small, or half of one medium jalapeno pepper, minced (seeds removed)
    • 1/8 cup olive oil
    • 4 medium tomatoes, diced
    • one large white onion, diced
    • juice of one large lime
    • 1/2 cup freshly chopped cilantro
    • generous pinches of salt and pepper, to taste         

    Directions for Salsa: 
    • Heat olive oil, garlic and jalapeno in a medium skillet on moderately high heat, stirring until garlic turns golden, about 2 minutes. Remove from heat and let cool.
    • In a large bowl, combine onion, tomato, and lime juice. Pour garlic, jalapeno and olive oil from pan over the rest of the ingredients. Add cilantro; mix all ingredients together.
    • Sprinkle liberally with salt and pepper, to taste. 
    • Set aside, and let ingredients sit for as long as possible; the longer they hang out in the bowl together, the more time the salsa has to enhance its flavors.     
    Directions for Tacos:
    1. Place beef in a large, shallow dish and drizzle generously with olive oil. Sprinkle generously with salt, pepper, sugar and spices. Gently rub marinade into beef with your hands, making sure to evenly coat each piece.
    2. Cover and let chill for at least 30 minutes; the longer the meat marinates the better it will taste.
    3. Thinly slice one medium or large yellow onion.
    4. Heat a combination of a tablespoon of butter and a bit of olive oil over medium heat, and stir in onions. Season with salt.
    5. Slowly cook over medium heat, covered, and stirring often, for about 30-40 mins.
    6. During the last few minutes of cooking, add a splash of vinegar, stirring to deglaze the pan. Set aside.    
    7. Heat a medium skillet (preferably the one you used for the garlic and jalapeno frying), lightly coated with oil, over medium-high heat. Place the tri-tip strips into the skillet and cook until well browned on all sides, turning with tongs, about 10 minutes. Transfer meat to cutting board and slice each piece into thin, 1/4-inch strips. Set aside.
    8. Drizzle same skillet with olive oil, enough to barely cover the bottom of the pan. Turn the heat on medium high, and lay tortilla in the pan, flipping over once with tongs. Fry for about 15 seconds on each side, or a bit longer if you like them crisper. 
    9. Add oil as needed, allowing it to heat up first in the pan, and repeat above step for desired amount of tacos.   

    Taco Assembly: 
    1. Layer fried corn tortilla with desired amount of steak slices, carmelized onions and salsa. Add toppings of your preference (we like to play it simple with some guacamole, to allow the steak and onions to really be the star of the show here, but it's up to you). Top with a dollop of yogurt, a sprinkle of lime juice and cilantro. 
    2. Try to eat your taco without the juices rolling down your chin (if you can) and most importantly, don't be afraid if you moan. It's normal when something is this good

    Saturday, June 12, 2010

    Saved by Salsa Verde and Claritin: an unlikely but pleasant combination.

    Summer is finally here. Our garden beds are bursting with green life and the herbs are spilling out of their pots and onto the porch, where Sammy lays panting contently in the warmth of the sun. Besides a bit of wind, the sky is bright blue and completely void of clouds- a perfect day for a bike ride.


    So off John and I go, he on his spiffy-and-shiny fixed-gear Bianchi, me on my laid back, 1964 Schwinn Cruiser (an oldie but a goodie). We make it about 1 mile, before I start sneezing and hacking and my eyes and nose itch so bad that I feel like screaming. Apparently summer is here, and so are my allergies. I try pushing through anyway, stubbornly pedaling against the wind. But my sneezing gets so bad that my tongue feels like it's swelling up, and with that, we turn around and sadly head back towards the car. On our way home, I am grumpy and defeated, and I know that the only way to boost my mood is some allergy-medicine and dinner, in that order.

    (Below is a drawing John made of my bike. She's a beauty, ain't she?)


    A few hours and a dose of Claritin later, I am in the kitchen, doing what I do best- lusting over the food I am about to cook. Besides nearly sneezing my head off today, I also managed to pick up some lovely produce from the Farmer's Market in town. Bright green and leafy rainbow swiss chard, enormous sugar snap peas, and some amazingly fragrant and heady China Rose garlic- the perfect component to some yellow corn and fingerling potatoes previously purchased at the grocery store.

    In no time at all, I begin to feel like myself again, chopping and mincing and stirring and tasting. The swiss chard is sauteed with garlic, salt and pepper, olive oil, and a bit of lemon juice and zest; the snap peas are also sauteed, on a higher temperature, with some garlic, olive oil and salt and pepper as well, cooked until they are slightly soft but still retain their crunch when bitten into. The corn is prepared simply, boiled and then rubbed with butter, salt and pepper. And the whole meal is rounded out with the fingerlings, which are halved, placed on a baking sheet, drizzled with olive oil and salt, and roasted in the oven (at 425 degrees) until their skins are slightly wrinkled and golden (about 20 minutes). But the real star of the show, is the salsa verde that is poured over the fingerlings when they are still warm from the oven. The fingerlings are then tossed, immediately speckled with garlic, red chili pepper flakes and parsley.

    Full belly and allergy-free, I find myself considerably more at peace. I can't tell whether this is because the Claritin has officially kicked in, or because I've just eaten the whole bowl of fingerling potatoes; but either way it seems like something to celebrate about, so I do, curled up on the couch with a glass of wine, a good book, and my dog at my feet.


    Salsa Verde for Potatoes:

    This recipe is adapted from the food blog 'Orangette'. The original recipe calls for 3 tablespoons of capers, which at the time of making this, I did not have in my possession. I made it without them, and it tasted divine- but if you would like to add the capers, by all means, go for it! And, if you don't, I can vouch that the salsa will absolutely be just as delicious on your potatoes.

    • 6 tablespoons good olive oil
    • 2 tablespoons finely chopped Italian parsley
    • 2 garlic cloves, pressed or minced
    • 1 ½ teaspoon lemon juice
    • ½ teaspoon finely grated lemon zest
    • 1/4 teaspoon kosher salt
    • Pinch of red chili pepper flakes
    Directions:

    1. Combine all the ingredients in a bowl and mix well with a whisk. Let sit for at 15-30 minutes, so the flavors have time to blend together.
    2. Pour over hot potatoes, and add more salt to taste if needed.

    Thursday, June 10, 2010

    a changed woman.

    When I was a kid I used to hate squash. I hated everything about it, from the taste, to the texture (oh lord, the texture!), to the way it smelled when it was cooking. Mushy and bland, I thought it was a child's worst food nightmare. And so I promised myself I would never, ever, be a lover of squash, and moved on with the rest of my life.

    And I didn't look back.

    Until, about five years ago, when I met John and he claimed to be the biggest squash-lover there was. He was shocked at my life long contempt for the soft and seedy vegetable and begged for me to give it another chance. Ah, the things we do for love....I gave in and agreed to try some squash- and I'm sorry reader, but I can't say I remember whether it was Butternut, or Delicata, or Acorn, I just remember it was some kind of winter squash- and we roasted it in the oven with a bit of olive oil, sea salt and pepper. We may have even drizzled a bit of maple syrup on it. Regardless, I took one bite, and in that moment, the Earth shifted beneath me. It was good. Really good. Apparently I had been missing out on something unbelievably delicious, and suddenly a whole new world opened up in front of my eyes. And John- who continually claims that in our relationship, their is an odd pattern where he is always wrong (even when he's not, that blessed man) and I am always right- was ecstatic over his victory. And rightfully so. He had proved my food bias to be wrong in every way. Visits to the farmers market now included my once enemy, the squash- and was hence added to my list of vegetables that could and would inspire a wonderful, seasonal meal.

    And so. Yesterday John and I were shopping for dinner, tired from cooking a pretty extravagant meal the night before. We wanted something easy. Something simple. We headed over to some fine looking corn, bright yellow and vibrant, and it was added to the basket. For part of our previous dinner, I had roasted some whole, vine tomato's in olive oil, garlic cloves, thyme, salt and pepper, until there skins split open and their juices ran out and onto the pan. They were heavenly. There were still a few left over, so I thought, why not, I'll make a Corn and Roasted Tomato Salad. Basil, arugula, and some Cypress Grove goat cheese was added in the mix. And last, but not least, we eyed some beautiful looking Delicata squash and threw them in the basket too, to be roasted later as an accompaniment to the rest of our meal.

    At home, and listening to Billy Holiday (because everyone should do this while cooking in their kitchen), I tossed slices of the leftover roasted tomato with the corn (taken off-the-cob, of course), basil, arugula, goat cheese and some salt and pepper. I drizzled the whole thing with the lovely roasting juices I had saved from the pan the night before, and at the last minute splashed a bit of balsamic vinegar on top. It was phenomenal.

    Meanwhile, I roasted the Delicata squash in the oven with thyme, olive oil, salt and pepper. They came out golden and fragrant and wonderful. And I enjoyed every. last. bite.


    Roasted Delicata Squash
    1. Preheat the oven to 425 degrees.
    2. Cut the squash in half, length-wise, and remove the seeds. Cut each piece in half again.
    3. Place on a baking sheet and drizzle with olive oil, a pinch of salt and sugar (or honey, or maple syrup, I suppose), and some freshly ground black pepper. Add some sprigs of thyme leaves, and place in the oven.
    4. Roast for about 30 minutes. Enjoy.


    Monday, June 7, 2010

    Je T'aime, Tarte Tatin.

    I can't believe that in just a few weeks, I will be on a plane to Europe!!! I'll be visiting a few countries, staying with friends along the way; taking in different cultures and (most importantly) different foods. I will be spending a few weeks in Paris- and although it will be my first time, I know the moment that I lay eyes on all of those oh-so-Parisian buttery croissants and pâtisseries it will most certainly begin a love affair that I've suspected of having my whole life. I've been preparing myself by brushing up on my French, reading books like Julia Child's memoir, My Life in France (which is so amazing and inspiring by the way, if you haven't read it yet), and last but certainly not least, I've been having a go at some of my favorite French dishes, like this wonderfully delicious tarte tatin.


    Tarte tatin is one of those classically French desserts that everyone, and I mean everyone, cannot bring themselves to resist. Perhaps this is why, when I retrieved my bubbling, caramel and apple creation from the oven, and left the room for a total of 5 minutes, I came back to a tarte tatin with one slice suspiciously missing from it.

    I looked around the kitchen for likely suspects; Sammy, my labrador retriever, gazed innocently into to my eyes and I knew that although he was capable of many food-related crimes, he was not related to this one. And that's when I saw John. Or rather, the back of him. He was facing the stove, and seemed oddly quiet. He turned around, and with one look at his sticky and pastry crumb covered fingers, I instantly knew he was the tarte tatin culprit.

    Well well well, somebody got his hands caught in the cookie jar!

    So if you haven't noticed, that's why one of the photographs below is missing a slice. And you know what, it still looks delectable. So now, if you don't mind, I think it's my turn to dig in and give John a run for his money. À votre santé!!

    Tarte Tatin


    This recipe comes from a collaboration of three or four recipes, that I tweaked and meddled with until I was finally happy with the result. It's such a fun and easy dessert to make, as long as you have an oven-safe skillet and some fearlessness when it comes to flipping the tart onto a plate after it finishes baking. And honestly, if some of the apples end up sticking to the pan during this process, don't panic- just gently loosen them and place them back on to the plate- remember, no one's looking! Other than the flipping-of-the skillet trick, this recipe is mostly about caramelizing a bit of butter and sugar with apples and then finishing it off with a bit of pastry dough. Anyone can do it, I promise, and if you really want to take this baby to the next level, do as I did- and add vanilla bean to the butter, sugar and apples while they are caramelizing. The granny smith apples will be left speckled with the vanilla's sweetness, balancing out their tartness. Perfection. C'est Magnifique.


    One final note: This recipe is pretty forgiving, which is one of the reasons I love it. You can add more apples depending on the size of your pan, and it will probably come out still tasting phenomenal. You can also, evidently, do as I did and start off this recipe with a bang by placing the apples peeled side up instead of peeled side down. Yup. You heard me, I messed up my own recipe. Just look down at the photographs below. There's the proof. But you know what? Right before I placed the pastry
    round on top (which is when I realized my mistake), I gently and oh-so-carefully flipped the apples onto the right side and through the whole damn thing in the oven. And it came out tasting divine. So there.


    Tarte Tatin Ingredients:

    • a frozen puff pastry sheet OR homemade puff pastry dough (recipe follows)
    • 4 Granny Smith Apples, peeled quartered length-wise, and cored
    • 1/2 stick (1/4 cup) unsalted butter, softened
    • 1/2 cup sugar
    • extract from half a pod of vanilla bean
    • 1 beaten egg, for brushing the pastry
    • Special Equipment: an oven-safe skillet, 8 to 8 1/2-inches, or whatever you have that is closest to that.

    Homemade Puff Pastry:

    1. Place one cup all-purpose flour, 1/4 teaspoon salt, one tablespoon sugar in large bowl. Mix together.
    2. Add 1 stick (1/2 cup) of chilled unsalted butter, cut into pieces, and using your fingers work the butter in the mixture until it makes fine crumbs. Just don't let it become completely smooth, though.
    3. Set aside three tablespoons of water, and add it until the dough is just pulled together.
    4. With your hands, flatten out the ball of dough, until it is about 3/4-inch thick, and then wrap in plastic wrap and chill in refrigerator for 15 minutes.
    Directions for Tarte Tatin:

    1. Preheat oven to 400 degrees.
    2. Take homemade pastry dough or defrosted (already bought) pastry sheet and place on a floured work surface.
    3. Roll out the dough to a round that is slightly wider (on all sides) in diameter than the skillet you will be using. I like to find something that is the same measurement as the skillet, and then leaving myself a little extra room around the sides, I cut out my round from this. It works nicely, but you can do whatever works for you.
    4. Transfer pastry round to a baking sheet and chill.
    5. In an oven-safe skillet on moderately high heat, melt butter and vanilla bean (if using), swirling around so that the butter coats on bottom and all sides of the pan.
    6. Pour sugar evenly on bottom.
    7. Add apples, peeled side down, in concentric circles, arranging as many as can fit inside your skillet.
    8. Cook apples over medium high heat, undisturbed, untill juices are deep golden and bubbling, about 15-20 minutes.
    9. Remove skillet from heat and lay pastry round over apples, gently tucking in it's sides so that the dough curls a bit into the apples and caramel.
    10. Lightly brush pastry all over with egg wash.
    11. Poke a few holes with a fork or wooden skewer on the top of your pastry, so that as it puffs, the steam will be released and your pastry will not be misshaped.
    12. Place skillet in oven on middle rack. Bake for about 20 minutes, or until the apples feel cooked when inserted in the center with a wooden skewer.
    13. Remove from the oven and let chill for just a few minutes. Okay folks, here's where your fearlessness comes into play: place an inverted plate on top of the pan, and using potholders (it should be really hot so be careful!), hold skillet and plate tightly together and invert tart onto platter. Replace any apples that stick to skillet.
    14. Serve immediately (as if you could wait! ha!). This recipe makes about 6 servings, depending on how hungry you are.