Monday, May 31, 2010

This oatmeal tastes good? Yes folks, it can be done.

Happy Memorial Day everyone. Unfortunately for all you grillers out there, this will not be a holiday to remember. I know, that's the point of Memorial Day- to drink beer and grill lots and lots of meat, right?? But guess what. It's rainy and foggy and colddddd here. So grillers, all the best luck to you today- I hope you at least get to use your stove-top griddle. Ah well, c'est la vie.

With that said, it's almost noon and due to the weather it's been a slow start to my day. John and I are finally just about to make breakfast. On account of our weekend spent eating too many rich and salty foods, we've decided to surrender to a bland and tasteless bowl of oatmeal. Yup, you heard me.

Oatmeal. Tastes like cardboard if you don't prepare it right. Lots of fiber. Mom always told me to eat it. But somehow, it's never been that appealing. Don't get me wrong, I've gone through "health phases" where I wake up every morning and force myself to eat the mushy monster. But, as of lately, I want nothing to do with oatmeal. So, friends- I am about to do the impossible. I am going to attempt to make my oatmeal actually taste good. Here goes.

I guess I have to add, that the following recipe is not to be taken as health food. In my humble opinion what makes this oatmeal actually worth finishing (and pretty darn delicious for mush), is the fact that I coax it into submission with a bit of butter and cream. Come on, you should know me by now. This recipe makes two hearty servings of oatmeal. Eat up kids.

Ingredients:
  • 1 cup Bob's Red Mill Organic Scottish Oatmeal (I'm weird about texture, so I prefer the porridge-like consistency of scottish oats versus the regular modern rolled oats. Plus, I think the Scottish version tricks me into thinking I'm eating something special and not any old bowl of oatmeal)
  • 3 cups water
  • 1/2 teaspoon salt
  • 2 tablespoons unsalted butter
  • 1/2 cup sliced strawberries or any other fruit you prefer (I think any berry works nicely)
  • 1 tablespoon or so of honey, depending on how sweet you like it
  • 2 tablespoons cream
  • sprinkle or so of cinnamon
Say hi to Sammy, my labrador retriever. He likes this recipe because while I'm chopping the strawberries, he tends to get all their tops. And strawberries are one of his favorite things!

Directions:
  1. Bring water and salt to boil. Add 1 cup oatmeal, turn heat down and cover and cook for 10 minutes.
  2. Remove from heat. Equally divide oatmeal into two separate bowls.
  3. For each bowl, add one tablespoon butter, one tablespoon cream, and honey to taste. Mix well.
  4. Top each bowl with 1/4 cup sliced strawberries and sprinkle each with cinnamon.

Thursday, May 27, 2010

When you just can't seem to eat any more leftover roast chicken: A Recipe for Chicken Salad Sandwiches

It's still raining, and now I don't want to leave the comfort of my warm, dry house. Instead of taking a visit to the grocery store, I've decided to hibernate under the covers on the couch. This means I am stuck in my kitchen, trying to make something out of nothing. And that's when I remember the roast chicken I made last night: score.

This recipe is the perfect answer for too much leftover roast chicken. Sometimes, I catch John eating it, cold, out of the refrigerator, and that's fine too. I have my own personal trashcan for any foods I can no longer find a use for. But most of the time, we both can't seem to make ourselves eat any more of the damn chicken.


And that's where this recipe comes in. It's fast, easy and like most things I like to make, can be tweaked depending on your mood or preference. This variation has apples in it, which holds a special place in my heart. I used to hate tuna salad as a kid growing up, and no matter how many times I tried it I just couldn't like it. Then one day, my dad prepared HIS version of it for me; it had diced apples in it. I took a bite, and voila, I became a lover of tuna salad. I know this is chicken salad- but the apple still elevates this meal from so-so to amazing, giving it another layer of flavor and crunch. This recipe makes approx. 3-4 sandwiches.

Ingredients:

  • 2 cups chopped already cooked/leftover roast chicken meat
  • 1/2 of an apple, finely diced
  • 1 celery stalk, finely diced
  • 1 small dill pickle, finely diced
  • 1 tablespoon (or so) of dijon or stoneground mustard (I like to mix the two)
  • 1/4 cup mayonnaise or vegenaise
  • 1/8 cup minced red onion
  • dash of pickle juice from the jar
  • salt and freshly ground pepper
  • drizzle of olive oil
  • slices of light rye bread, or whichever you prefer

The dash of pickle juice from the jar is one of my coveted kitchen secrets for any chicken or tuna salad sandwich (or potato salad, for that matter). It's not the biggest deal to omit it if you don't have it in your fridge already, but it brings out all the other flavors in the salad and adds just the tiniest bit of zing to your palate. Do it, seriously. You're taste buds will thank you later.


Directions for salad:
  1. In a medium-sized bowl, combine first seven ingredients together.
  2. Drizzle with olive oil. This is a great way to add much needed moisture to your chicken salad, without having to add more mayo into the mix (which is much more unhealthy than the olive oil).
  3. Sprinkle with salt and pepper to taste.
  4. Combine everything together, making sure it is well blended.
  5. Scoop desired amount of chicken salad mixture onto a slice of toasted bread, slathered with more mustard or mayo, if preferred. Add lettuce and final slice of toasted bread and you are good to go. Enjoy!

Wednesday, May 26, 2010

The Perfect (Perfect!) Roast Chicken

So after some rainy day blues, I was craving something comforting and mindless from the kitchen. This roast chicken hits the spot every time, and there's always leftovers the next day (my boyfriend particularly likes to make chicken salad sandwiches with it). I have made many, many a roast chicken- each one a bit different- but this combination of ingredients produces the most fragrant, aromatic, and flavorful roast chicken I have EVER tasted.

I totally get that you can find an already-cooked rotisserie chicken at most grocery stores these days, and every once and awhile I give into my laziness and opt for one instead of cooking my own- but there is something so comforting and old-school about roasting your own chicken. And the smell that permeates from the oven will make you thank yourself for not giving into the convenience of a store-bought chicken (believe me, I can smell mine roasting away right now, and it's like heaven).


Like I said, this recipe is pretty mindless and simple. I know the browned herb-butter portion of this recipe takes a little extra time than your usual "throw-it-all-together roast chicken", but I promise it won't disappoint- the butter creates the most amazing caramelized skin on the chicken that is the kind of thing I dream about at night (yah, I know, I'm kind of a foodie).


So without further adieu, here is the recipe!

Ingredients:

  • 1 (5 to 6 pound) roasting chicken
  • Salt and freshly ground pepper
  • 2 tablespoons butter
  • 1 teaspoon minced rosemary
  • 1 teaspoon minced thyme
  • few sprigs thyme
  • few sprigs rosemary
  • 1 head garlic, cut in half crosswise
  • 2 garlic cloves, thinly sliced
  • 4 carrots, cut into chunks
  • 2 celery stalks, cut into chunks
  • 1 large onion, cut into large chunks
  • 1 small yam/sweet potato, cut into chunks
  • 1 lemon, quartered
  • 1 orange, quartered
  • 2 bay leaves
  • tiny sprinkle of fennel seeds (optional)
  • Olive oil
On a side note: I know this seems like a lot of ingredients, and I know that not everyone has all of these lying around in their kitchen or pantry. But that's the beauty of this meal- you can substitute and/or omit anything you like, for the most part. This is just what works for me. I think the only ingredients that are a must would be the garlic, lemon, butter or oil, onion, salt & pepper- from there you could experiment with different vegetables or herbs to your preference. But please, add SOME kind of herbs- it makes all the difference.


Directions:
  • Preheat oven to 425 degrees.
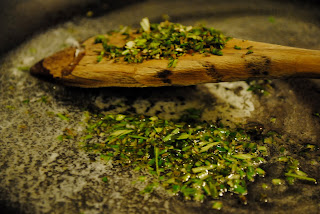
  • Heat butter in a frying pan over medium high heat. When butter is just melted, add two teaspoons of minced rosemary and thyme and cook until butter just begins to lightly brown. Remove from heat.
  • Remove the chicken giblets. Rinse chicken inside and out. Remove any excess fat and remove neck.
  • Pat dry. Generously salt and pepper the inside and outside of the chicken. Stuff the cavity with few sprigs of thyme and rosemary, half the lemon slices, half the orange slices, half the garlic head, and one bay leaf. Stuff sliced garlic underneath skin of chicken.
  • Tie the legs together with kitchen string.
  • Place the onions, celery, carrots, yam, remaining half of garlic head, and remaining orange and lemon slices around the bottom of a roasting pan and toss with salt, pepper and olive oil and few more sprigs of thyme and rosemary, if desired. Place chicken on top.
  • Pour herb butter over the top of chicken, and lightly rub into the skin. Sprinkle a few fennel seeds over top of chicken.

  • Roast chicken for 1 hour-1 1/2 hours; until the juices run clear when you cut between a leg and thigh (or until an instant-read thermometer inserted into the thickest part of the thigh reads 160 degrees).
  • Once removed from oven, cover with aluminum foil for about 20 minutes (this is what makes the difference between a DRY chicken, and a MOIST chicken. This allows the juices lost during cooking to go back into the chicken, which makes your chicken VERY happy).
  • Place chicken and vegetables on a platter and enjoy!

Friday, May 21, 2010

Angel Hair Pasta with Hot Cherry Tomatoes

This unbelievably delicious pasta dish is adapted from a Rachael Ray recipe for bruschetta with spicy tomatoes. I tweaked the recipe a bit and substituted the bread for angel hair pasta to make a meal that is perfect for entertaining- you can whip it up in about 15 mintues but it tastes like it's been cooking for hours (I'm not lying, seriously it does). We like ours extra hot, but you can always use less crushed red pepper flakes if you like your dish not as spicy.

Ingredients:
  • 2-3 tablespoons extra-virgin olive oil
  • 5 cloves garlic, minced
  • 2 pints cherry tomatoes
  • 1 teaspoon crushed red pepper flakes
  • salt
  • 1/2 pound dried angel hair
  • a handful of flat-leaf parsley, chopped
  • a handful of basil leaves, chopped
  • 1/2 cup-3/4 cup grated parmesean cheese
Directions:
  1. Bring a large pot of water to boil and add one tablespoon of salt and a splash of olive oil to the pot.
  2. Meanwhile, heat the olive oil in a medium skillet over medium heat. Add the garlic and red pepper flakes and saute for 2 minutes; then add the tomatoes and season with salt, to taste, and toss to coat in oil.
  3. Cover the pan, raise heat slightly and cook until the tomatoes burst, about 10-15 minutes.
  4. While the tomatoes are cooking, add the angel hair to the pot of boiling water and cook according to directions on package. Drain the pasta, reserving some of the pasta water.
  5. Remove lid from tomatoes, squish any left over whole tomatoes with the back of a wooden spoon and let thicken, about 1 minute.
  6. Stir in the parsley and basil, adjust the seasoning and remove from heat.
  7. Transfer pasta and 1/8 cup pasta water (or more depending on how dry your pasta is) into pan with tomato mixture, combining well.
  8. Add parmesan cheese and toss all together.
  9. Serve with extra basil sprinkled on top and a bowl of extra grated parmesan on the side. Bon appetit!!

Thursday, May 20, 2010

Strawberry-Raspberry Sorbet

I'm the kind of cook whose food cravings depend on the season. In the Winter I feel like hibernating inside all day, and that's usually when I find myself making slow-cooked meals; a hearty soup simmering away on the stove, a fresh baked loaf of bread in the oven. But come Spring, my palate wants one thing and one thing only: fruit. Lots and lots of fruit. Spring is when berries are bountiful and at their ripest; they are usually cheaper around this time, too.

This strawberry-raspberry sorbet is the first thing I make when it's warm outside and I bring home too many berries than I know what to do with. It produces a beautiful reddish-pink sorbet that is tangy and sweet all at the same time. Although this recipe is quite simple, the one thing I must preface is the importance of using fresh, local or organic berries at the peak of their flavor; trust me on this one, it can make or break the taste of your sorbet.
Yield: Makes one quart.

Strawberry-Raspberry Sorbet
Recipe adapted from Gabrielle Carbone, coproprietor of The Bent Spoon ice cream parlor in Princeton, New Jersey

Ingredients:

  • 1/3 cup water, preferably spring or filtered water (this sorbet is essentially fruit and water, so what you put in is what you get)
  • 3/4 cup sugar
  • 1/4 teaspoon salt
  • 1 1/2 pounds of fresh strawberries, rinsed, patted and dry, and hulled
  • 1/2 pound of fresh raspberries
  • 2 1/2 to 3 tablespoons lemon juice, depending on sweetness of berries
  • 1 large egg white (optional- but it helps stabilize and preserve the consistency of the sorbet if you plan to keep it in your freezer for a few days)

Directions:

  1. To make a simple syrup, combine the sugar, water and salt in a saucepan over medium heat. Cook, stirring constantly, until the sugar and salt dissolves, about 2-3 minutes. Let cool for at least 10 minutes.
  2. In a blender, puree the strawberries, raspberries, simple syrup and lemon juice in batches, until very smooth.
  3. Transfer puree into pitcher or an open container, and cover and refrigerate until chilled, at least 2 hours. (You can leave it over night if needed)
  4. Churn in an ice cream maker according to manufacturer's directions. If you are using the egg white, add it during the last few minutes of churning.
  5. The sorbet is particularly soft after churning. If you prefer a firmer texture, freeze for at least one hour before serving.
  6. Store tightly covered, in the freezer.

Wednesday, May 19, 2010

Pan-fried Turkey Burgers and THE BEST Spicy Yam Fries EVER

Turkey burgers can be tricky because they can become dry pretty easily; and nobody likes a dry burger. This recipe makes a fool-proof moist burger and is the healthiest fix for 'burgers and fries' that you've ever had (esp. considering the yam fries are baked, not fried). This recipe makes two burgers and enough fries for two people.

Ingredients for Turkey Burgers:

  • 1/2 pound ground turkey
  • few slices tomato
  • few leaves lettuce
  • whole-wheat buns (or whatever you prefer)
  • two cloves of garlic, finely minced
  • 1/8 teaspoon salt
  • 1/8 teaspoon ground black pepper
  • 1/2 teaspoon cajun seasoning
  • two tablespoons of good olive oil
  • condiments, such as ketchup, mayo, and mustard
  • few slices of smoked-chedder cheese, optional
Ingredients for Spicy Yam Fries:
  • one large (or two medium) garnet yam
  • 1/2-1 teaspoon salt
  • 1/4 teaspoon ground black pepper
  • pinch of cayenne
  • pinch of paprika powder
  • 2-3 tablespoons of good olive oil
Although you can use any kind of olive oil you have lying around, I can't tell you how much good quality olive oil makes a difference in the overall taste of this meal. Try it, it's worth it!

Directions:

  1. Preheat the oven to 400 degrees.
  2. Slice yam into 1/4 inch fries, then lay out on a cookie sheet in a single layer. Drizzle 2-3 tablespoons of olive oil evenly on fries. Sprinkle with salt, pepper, paprika and cayenne; toss to coat.
  3. Bake in oven, flipping every 15 minutes, until golden on outside, about 30 minutes.
  4. In the meantime, in a large bowl, mix one tablespoon of olive oil, minced garlic, salt, pepper, cajun seasoning and ground turkey, using your hands to combine the ingredients together. Form into two patties.
  5. Cook patties in a frying pan coated with remaining olive oil over medium-high heat, 5-6 minutes on each side. When in doubt, apply pressure from the back of a spatula onto one of the patties. If firm, meat will be thoroughly cooked through; if the patty is a bit squishy then the meat is still undercooked.
  6. Half way through cooking the patties, lay thin slices of cheese on burger buns and place in toaster oven. (If you don't have a toaster oven, you can melt the cheese on the patties during the last 5 minutes of cooking).
  7. Remove yam fries from oven and let sit for 5 minutes (this last step is very important if you want crispy, not mushy fries).
  8. Assemble turkey burgers in whatever fashion you prefer, and serve with yam fries alongside.

Johnny's Jazzed-up Egg and Bacon Breakfast Sandwich

Don't let the name fool you- this is delicious for lunch as well- we've even had it for dinner on occasion. We microwave our bacon, which my parents always did growing up (I think it gets rid of some unneeded bacon grease). This couldn't be an easier recipe, and it tastes so good that we make it about 2-3 times a week. The recipe makes two whole sandwiches. Enjoy.

Ingredients:
  • Jewish Light Rye Bread, four slices (any sliced bread of your liking will do)
  • two eggs
  • one avocado
  • sliced bacon, 4-6 slices (we use turkey bacon, b/c it's higher in protein and healthier)
  • few tomato slices
  • few leaves of lettuce
  • handful of alfalfa sprouts (optional)
  • super easy spicy aioli spread (recipe follows)
Super easy spicy aioli spread:
  • 1/2 mayonnaise (we use dairy-free mayo, which I highly reccomend- it's healthier than regular mayo and tastes delicious)
  • about one tablespoon of Sriracha Hot Chili Sauce (adjust to your liking- we use about one tablespoon but we like our spread spicy. If you don't already have Sriracha lying around in your pantry, you can pick it up at practically any grocery store in the International Foods Section. It's cheap and useful for spicing up lots of other dishes- we use it all the time).
  • To make spread, just mix both ingredients together untill well combined. That's it!
Sandwich assembly:

  1. Lay slices of bacon on a microwavable-safe plate that has been covered with a paper towel. Cook for as long as it takes depending on your microwave- the bacon should be crispy but never burned. It takes us about 6-8 minutes to cook the bacon, flipping the slices once on each side.
  2. In the meantime, heat a frying pan lightly coated with olive oil on medium heat. When pan is hot, fry both eggs to your preference. Don't forget to sprinkle them with salt and pepper!
  3. This would be a good time to put the slices of bread in the toaster.
  4. Slice up a tomato, and avocado- reserving one half of the avocado for each sandwich.
  5. Spread spicy aioli liberally on all slices of bread. Lay an egg on one slice of toast and follow on top in this order: bacon, tomato, avocado, lettuce and alfalfa sprouts.
  6. Cover with final slice of bread and bon apetit!


here's to new beginnings...


I've decided to start a blog because my kitchen drawer is starting to overflow with too many recipes. They are scribbled on bits and pieces of paper, receipts, even a few napkins. Most of them are covered in stains that mark a successfully made meal, their edges curled over with too much use.

For me, cooking is a daily ritual. It's like breathing. I can't go on without it! It makes me sad when people are afraid to use their own kitchen, or when they say things like "I don't have time to cook" or "It's too complicated". The thing is, cooking can be anything you want it to be. It can be a slow meal, simmering all day in a giant pot; or it can be a quick fix when you're in a hurry but is just as delicious. Either way, cooking doesn't have to be complicated and ANYONE can make time in their lives to enjoy a home-cooked meal.

After years of cooking for family and friends and seeing their faces light up from something they've just tasted, I've realized that I want to share the joy of cooking on a much bigger level. I want to share it with all of you. This will be a place where you can find recipes for meals that make you feel good, on the inside and the outside- whether it entails fresh vegetables from the summer farmer's market or making use of your pantry by sprucing up winter dishes with spices.

Renaissance means 'rebirth'. I want this blog to be a way for me to share some ubelievable food memories, in hopes that the rest of you will make your own, creating your own "renaissance in the kitchen".